There’s nothing more frustrating than grinding for hours to get a perfect sharpness V diamond sword, only to watch its durability tick down with no way to repair it without losing enchants. I’ve been there too, scrambling through my chests mid-creeper attack trying to find a way to save my best gear before it breaks for good. That’s why learning how to make an anvil in Minecraft is such a game-changing skill for any player, whether you’re playing casual survival or running a hard mode world with friends. It unlocks so many core features you can’t access any other way, and it’s far easier to craft than most new players assume.
How to Make an Anvil in Minecraft: Exact Crafting Recipe Steps
First, you’ll need to gather the right materials before you can craft your anvil. Don’t worry, none of these are impossible to find, even if you’re only a few weeks into a new survival world. You’ll need:
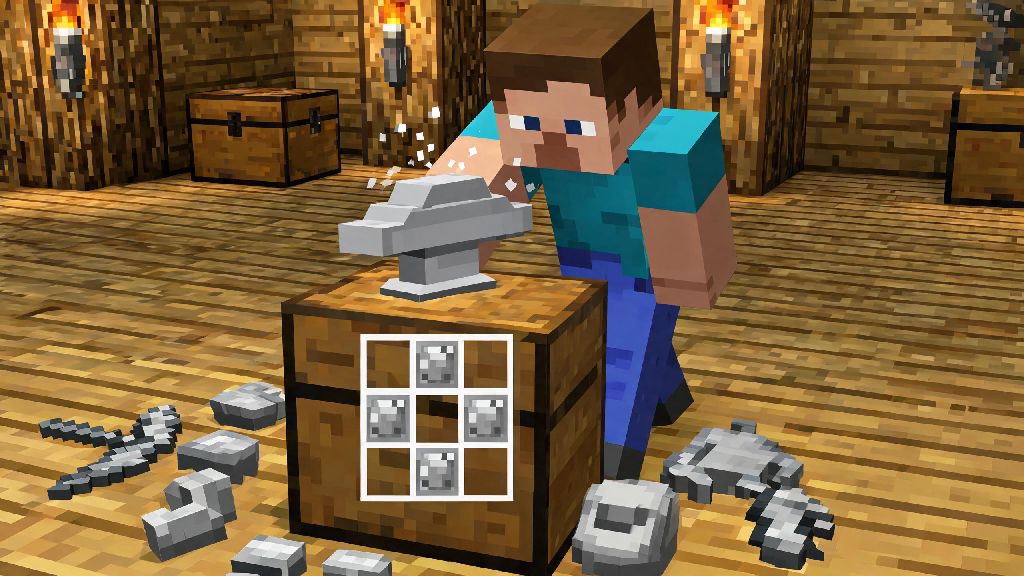
Once you have all your materials, open your crafting table and arrange them exactly as follows to avoid wasting resources. Place the 3 iron blocks in the entire top row of the 3x3 grid. Next, put 1 iron ingot in the middle slot of the second row. Finally, fill the entire bottom row with the remaining 3 iron ingots. If you arranged them correctly, you’ll see a single anvil pop up in the result slot on the right. You don’t need any extra tools or special materials to make an anvil in Minecraft, just the iron we listed earlier and a crafting table. If you play on a version older than 1.4, the recipe is slightly different, but almost all active servers and single player worlds run on newer versions where this standard recipe works. You can also find damaged anvils in village blacksmith chests, woodland mansions, and even ruined portal chests if you’re lucky. I always grab those when I find them, since they save me hours of mining iron early on.
Key Uses for Your Anvil Beyond Basic Repairs
Most new players only use their anvil to repair damaged gear, but that’s just the tip of the iceberg when it comes to what this block can do. Applying enchantment books to gear is by far the most valuable use for most players. If you’ve fished up a mending book or looted a sharpness V book from a dungeon, you can combine it with your desired tool, weapon, or armor piece on the anvil to add the enchant without risking destroying the item like you would with an enchanting table. You only need to make sure you have enough experience levels to cover the cost of the combination, which varies based on the strength and rarity of the enchant.
Another underrated use is renaming items and blocks for just 1 experience level. I rename all my best gear with silly nicknames to avoid mixing them up with my friends’ items when we play on a shared server, and I also rename chests to make storage organization far easier. You can also combine two enchanted items of the same type on the anvil to merge their enchantments into one stronger item. For example, if you have a pickaxe with efficiency III and another with unbreaking II, combining them will give you a single pickaxe with both enchants, as long as they don’t conflict. Just keep in mind that every action you take on the anvil costs experience levels, so you’ll want to keep a XP farm close by if you use it often.
Common Anvil Mistakes to Avoid Wasting Resources
It’s easy to make simple mistakes with anvils that end up costing you dozens of iron ingots and hours of grinding, so I’ve put together the top mistakes I see new players make all the time. If you’re making an anvil in Minecraft for the first time, it’s easy to forget how heavy and gravity-dependent the block is, so double check your placement before you click to set it down. First, don’t place your anvil on a non-solid block or high up without a barrier around it. Anvils are affected by gravity, just like sand and gravel, so if you place it over an empty space it will fall and break any items it lands on, and it can even deal damage to you if it hits your head. I learned that the hard way when I tried to place an anvil on the second floor of my first base and it fell right through my glass floor, smashing my potion brewing stand below.
Second, don’t try to repair items using the anvil more than a handful of times. Each time you repair an item, the “prior work penalty” goes up, meaning the experience cost for the next repair or enchant application will get higher and higher, until it eventually becomes too expensive to use at all. If you have a really high value item with multiple enchants, use a mending book instead of regular repairs to avoid this penalty stacking up too fast. Third, don’t ignore the damage state of your anvil. Every time you use it, there’s a 12% chance it will take a small amount of damage, and it will break completely after around 25 uses on average. You can tell how damaged it is by its texture: a slightly chipped anvil is at 75% health, a very damaged one is at 25%, and it will disappear entirely once it runs out. You can’t repair a damaged anvil, so you’ll need to craft a new one once it breaks. Save any damaged anvils you find in chests for low-stakes uses like renaming items, so you don’t waste durability on your brand new anvil for simple tasks.
How to Extend Your Anvil’s Lifespan for Long-Term Use
Even though anvils can’t be repaired, there are a few easy tricks you can use to make them last far longer than the average 25 uses. First, separate your high-impact and low-impact anvil uses across multiple anvils. Keep a brand new anvil near your enchanting area exclusively for combining high-value enchants and repairing endgame gear, and keep a beat up damaged anvil near your storage area for simple tasks like renaming items or combining low-tier tools. This keeps your high durability anvil from being wasted on 1-XP tasks that don’t need a perfect anvil. I’ve had my main endgame anvil for over 2 months of regular play using this trick, which has saved me nearly 100 iron ingots in replacement costs.
Second, avoid using the anvil for repairs you can do for free other ways. If you have a stack of spare diamond pickaxes that only have unbreaking I, just combine them in your crafting grid instead of using the anvil, since that won’t cost any XP or anvil durability. The only time you should use an anvil for repairs is when you’re saving enchants on the item. Third, place your anvil in a protected spot where it won’t take environmental damage. Don’t leave it out in the open where creepers can explode next to it, and don’t place it near lava or fire, since it can burn if exposed to high temperatures for too long. I keep all my anvils in a locked room in my base with no windows, so I never have to worry about random mob attacks destroying them mid-use. If you play on a multiplayer server, you can also lock your anvil with a protection sign to stop other players from using up its durability without your permission.
At the end of the day, an anvil is one of the most versatile and useful blocks you can add to your base, no matter what playstyle you prefer. Taking the time to learn how to make an anvil in Minecraft will open up so many new possibilities for upgrading your gear, organizing your storage, and getting the most out of every enchant you find. It might feel like a lot of iron to spend upfront, but I promise it’s worth every single ingot once you start using it to save your best gear from breaking forever. Next time you’re back at your base with a stack of iron ingots, give the recipe a try, you won’t regret it.