Anyone who’s spent hours sorting through messy chests after a long mining trip knows how tedious inventory management can get in Minecraft. You might have seen other players’ fully automatic crop farms or color-coded sorting systems and wondered how they pull off such seamless builds. The secret ingredient for almost all these time-saving contraptions is the humble hopper, and if you don’t know how to make a hopper in Minecraft yet, you’re missing out on one of the most useful items in the entire game. I’ve been playing Minecraft for over a decade, and I still use hoppers in almost every base I build, from tiny survival huts to massive creative mode megabases. Even if you’ve never touched redstone before, this guide will walk you through everything you need to know without any confusing jargon or overly complicated steps.
What You Need to Make a Hopper in Minecraft
To craft a hopper, you only need two common materials that you can get very early in survival mode, no rare drops or late-game resources required. That means you can start building automated systems within your first few hours of a new survival world, no endgame grind needed. Let’s break down exactly what you need, plus how to get each item if you don’t have them on hand already.
You might be surprised you don’t need any redstone dust to craft a basic hopper, which is why it’s accessible even for brand new players who haven’t started experimenting with redstone yet. The only thing you’ll need extra is a crafting table, obviously, since this is a 3x3 crafting recipe that won’t show up in your personal 2x2 inventory grid.
Step-by-Step Hopper Crafting Instructions
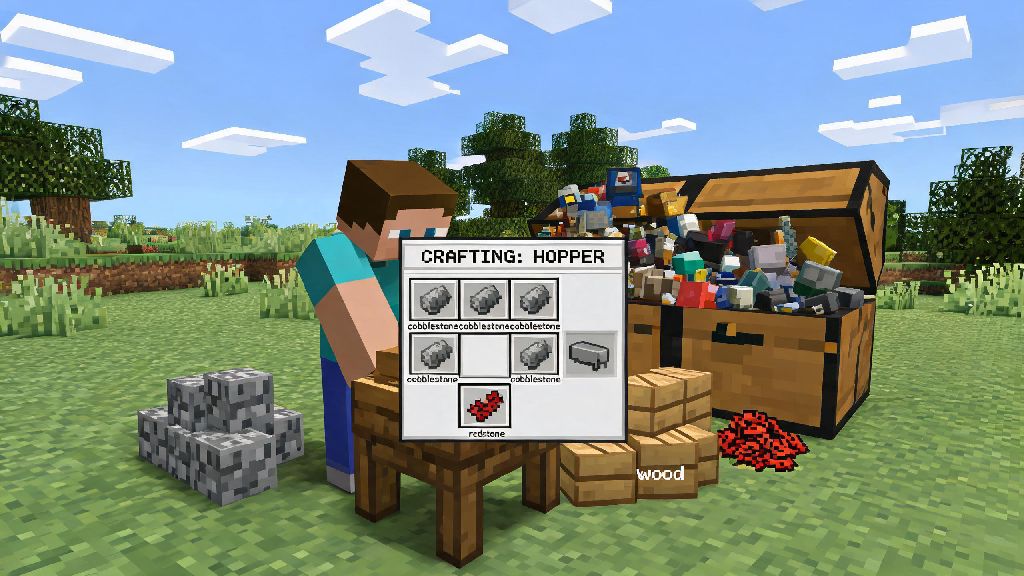
The hopper crafting recipe is the same across all Minecraft platforms, from Java Edition to Pocket Edition to console versions, so you don’t have to memorize different rules depending on where you play. Open your crafting table to pull up the 3x3 grid, then arrange your materials exactly as follows to get your hopper.
Place one iron ingot in the top left slot, one in the top middle slot, and one in the top right slot of the grid. Next, put one iron ingot in the middle left slot, and your single chest in the very center slot. Finally, place the last iron ingot in the bottom middle slot, leaving the bottom left and bottom right slots empty. If you mess up the arrangement, you won’t get the hopper, so double check that you didn’t put an iron ingot in the wrong slot by mistake. I’ve messed that up more times than I care to admit when I’m rushing to build a storage system after a long caving trip.
Once the hopper pops up in the result slot on the right, grab it and move it to your inventory, and you’re done. You can craft as many hoppers as you need in one go, as long as you have enough iron and chests. For most basic sorting systems, you’ll need at least 6 to 10 hoppers, so it’s worth stocking up on iron if you plan to build one soon.
Practical Uses for Your New Hopper
A lot of new players craft a hopper and then have no idea what to do with it, but it’s one of the most versatile items in the game. You don’t have to build a complicated redstone computer to get value out of it either—there are tons of simple uses that will make your gameplay way smoother even if you’re a total beginner.
The most common use for new players is auto-collection for farms. If you place a hopper under a block where items drop, like under a wheat farm where you break crops, or under a mob farm where mobs die, the hopper will automatically pick up all dropped items and move them into a connected chest. This saves you hours of running around picking up items manually, especially for farms that run while you’re off exploring or mining in other parts of the map.
Next, you can use hoppers for basic storage sorting systems. You can connect multiple hoppers to chests and add simple filters to send specific items to specific chests. For example, you can set one chest to hold all your cobblestone, another to hold coal, another to hold diamonds, and all items you dump into the input chest will automatically sort themselves. I use this in every survival base, and it cuts down my inventory management time by 70% easily. No more digging through 10 chests looking for a single diamond when you want to make a new pickaxe.
You can also use hoppers to automate furnaces. Place a hopper on top of a furnace to feed it items to smelt, a hopper on the side to feed it fuel, and a hopper under the furnace to collect the smelted items. You can dump a full stack of raw iron and coal into the connected chests, and come back later to a full stack of iron ingots with no extra work. Just make sure you place the hoppers correctly — if you place a hopper on the side of the furnace instead of the top, it will feed fuel, not items to smelt, so you’ll have to break it and replace it if you mess up the placement.
Common Hopper Mistakes to Avoid
Even though hoppers are pretty straightforward to use, there are a few common mistakes that new players make all the time that can break their builds. Let’s go over these so you don’t waste 30 minutes troubleshooting a simple fix like I did when I first started using hoppers.
First, forgetting that hoppers only transfer items downward or to the container they’re facing. If you place a hopper on the ground with no chest under it, it will collect items that land on top of it, but it won’t move them anywhere, so they’ll just sit in the hopper’s inventory until you take them out. If you want to move items upward, you’ll need to pair your hoppers with droppers and redstone, but that’s a more advanced build for later.
Second, activating a hopper with a redstone signal. Hoppers stop working entirely if they get a redstone signal from a lever, button, pressure plate, or any other redstone component. If your hopper isn’t transferring items, the first thing you should check is if there’s any active redstone nearby that’s triggering it. This is a super common mistake when building redstone contraptions that mix hoppers and other redstone components, so it’s always the first thing I check when one of my hopper builds stops working.
Third, not using filters for sorting systems. If you don’t add a filter—usually one of the target item in the first four slots of the hopper—all items will flow through the hopper instead of being sorted into the correct chest. You only need one of the target item per filter hopper, so you don’t have to waste valuable resources like diamonds or netherite on filters. Just make sure you don’t take the filter item out of the hopper, or the whole system will break.
Hoppers are one of those game-changing items that make Minecraft feel way less grindy and way more fun, once you know how to use them. Once you know how to make a hopper in Minecraft, you’ll start noticing places to use them everywhere, from your small starter base to your end-game megabase. You don’t have to be a redstone expert to get value out of them either — even a simple auto-collection system under your wheat farm will save you tons of time you can spend exploring, building, or fighting the Ender Dragon. If you’re still nervous about using hoppers, start small: Craft one, place it under a chest you use often, and see how it works for you. You’ll be hooked in no time.