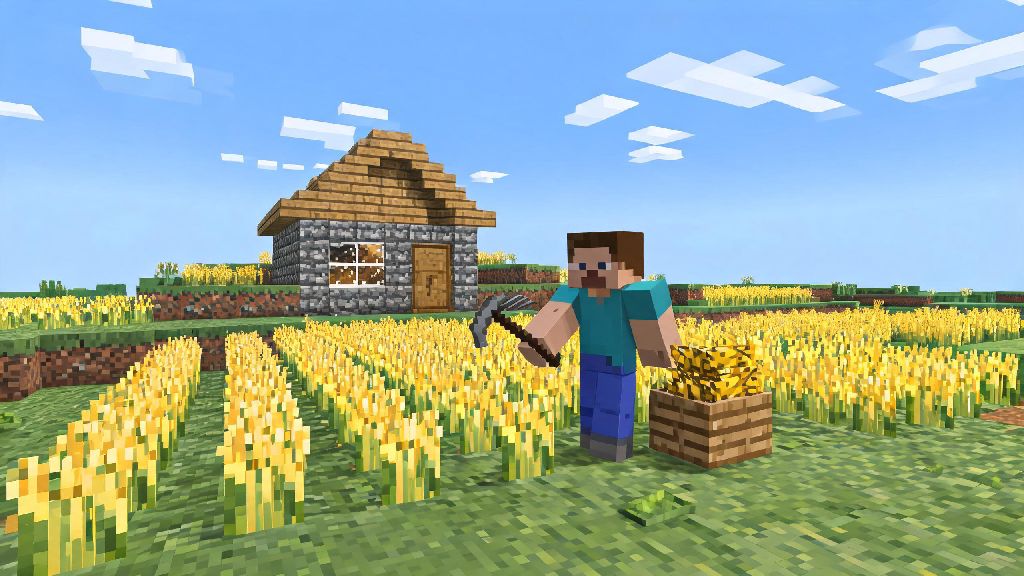
If you’ve ever spawned in a new Minecraft PC world with half a heart of hunger and no food in your inventory, you know how urgent it is to find a quick, reliable food source. You might run after cows or chickens for 10 minutes only to end up with raw meat that gives you food poisoning, or stumble on a village with a garden that’s already been picked clean by other players on a multiplayer server. Unlike raw meat that can leave you sick or cake that requires rare ingredients like eggs, sugar, and wheat, bread is one of the most accessible, low-effort meals you can craft early on. We’re breaking down exactly how to make bread on Minecraft PC, plus extra tricks to make your wheat farming more efficient and get the most out of every loaf you bake.
What You Need to Make Bread on Minecraft PC
The core ingredient for bread is just 3 pieces of wheat, no fuel, special tools, or rare drops required. That’s part of what makes it such a perfect early-game food source. Before you can craft your first loaf, you’ll need to gather a few basic supplies to grow wheat, unless you get lucky and find wheat in a village farm or chest.
Many new players assume they need to build a crafting table first to make any food items, but that’s not the case for bread. You don’t need a crafting table to make bread – you can arrange the 3 wheat in a horizontal row in your personal 2x2 inventory crafting grid to get a loaf immediately. The only time you might need a crafting table is if you’re making large batches of bread at once, since the 3x3 grid lets you arrange multiple rows of wheat at the same time to craft more loaves per craft.
Step-by-Step Process to Grow Wheat and Craft Your First Loaf
Once you have your basic supplies, you can have your first loaf of bread in less than 30 minutes of real time, even if you’re a total beginner. Start by finding a flat spot of dirt or grass within 4 blocks of a river, pond, or any standing water block. Equip your hoe, right click each dirt block you want to use for farming to turn it into tilled farmland. Seeds grow 30% faster if the farmland is hydrated, so don’t plant your seeds farther than 4 blocks from your water source.
Right click the tilled farmland with your wheat seeds to plant them. If it’s raining, your crops will grow slightly faster even if you don’t have direct sunlight, but you still need to make sure they’re hydrated. I once tried to farm wheat in a cave without torches, and all my seeds popped out of the farmland after 2 minutes, so don’t make that mistake. Once your wheat is fully grown, it will have a bright golden brown top, instead of the pale green color of immature wheat.
Never break wheat before it’s fully grown – you’ll only get 1 seed back instead of wheat, wasting all the time you spent waiting for it to grow. Break the fully grown wheat with any tool, or even your fist, and you’ll collect the wheat and extra seeds immediately. Once you’ve got your 3 wheat, you’re ready to make bread on Minecraft PC without any extra steps. Open your inventory, drag the three wheat into three adjacent slots in a horizontal row in your crafting grid, and the bread will appear in the result slot. Drag it to your inventory, and you’re ready to eat.
Practical Uses for Bread Beyond Filling Your Hunger Bar
Each loaf of bread restores 5 hunger points (2.5 drumsticks) and 6 saturation points, which is better than raw carrots or potatoes, and doesn’t carry the risk of food poisoning like raw chicken or rotten flesh. It’s also stackable up to 64 per slot, so you can carry a full stack of bread in one hotbar slot for long trips without taking up extra inventory space. That makes it a better option than stackable foods like steak for early-game players who don’t have a lot of extra storage space.
Bread is one of the most cost-effective early game villager breeding items, since you only need 3 bread per villager to make them willing to breed, compared to 12 carrots or 12 potatoes for the same effect. If you’re building a villager trading hall early on, a small wheat farm can give you all the bread you need to breed dozens of villagers in just a few in-game days. If you’re making bread on Minecraft PC specifically for trading, you can easily grow 100+ wheat per harvest to get 5 emeralds per run, which is enough to buy a full set of iron tools from a toolsmith villager, or even a mending book if you get lucky with a librarian trade.
You can also use bread to heal tamed wolves, though it’s less efficient than meat, so I only save that for emergencies when I don’t have any raw pork or beef on hand. If you’re playing a hardcore world, keeping a stack of bread in your hotbar at all times is a smart move – it’s light, doesn’t spoil, and you can eat it quickly to fill your hunger bar if you get attacked by a creeper or fall off a cliff.
Pro Tips to Speed Up Bread Production on Minecraft PC
If you’re making bread regularly for trading, breeding, or long exploration trips, there are a few easy tricks to cut your farming time in half and get more wheat per harvest. The first trick is to use bone meal to grow wheat instantly. Bone meal is made from bones dropped by skeletons, each bone makes 3 bone meal, and each wheat plant only needs 1-2 bone meal to fully grow. If you have a basic skeleton farm set up, you can make hundreds of loaves of bread in just a few minutes.
A Fortune III hoe can cut your farming time in half if you’re regularly crafting large batches of bread for trading or villager breeding. A Fortune III enchantment gives you up to 4 wheat per fully grown plant, which triples your output without any extra farming work. You can get the Fortune enchantment from an enchanting table at level 15 or higher, or buy a pre-enchanted hoe from a toolsmith villager for just a few emeralds.
If you’re trying to scale up how much bread you can make on Minecraft PC per hour, an automatic farm is the best investment you can make early on. Basic automatic farms only need a few blocks, a bucket of water, and a couple of hoppers, no redstone knowledge required. You can find dozens of easy designs that take less than 10 minutes to build, and they’ll collect and store all your wheat automatically while you’re off mining or exploring. If you don’t have access to bone meal, you can also place a few beehives near your farm – bees pollinate crops as they fly back to the hive, which makes wheat grow twice as fast as normal. Don’t waste bone meal on unhydrated farmland – the crop will still grow slower even with bone meal, so always make sure your farm is near water first.
Bread might not be the fanciest food in Minecraft, but its accessibility and versatility make it a staple for every new and experienced player alike. It doesn’t require rare ingredients, complex tools, or a base to craft, so you can make it even on your first day in a new world. Whether you’re trying to fill your hunger bar on your first night, breed a village of librarian villagers for enchanted books, or stock up on trade goods for a long mining trip, it’s hard to go wrong with a stack of bread in your inventory. Next time you spawn into a new world, follow the steps we covered, and you’ll know exactly how to make bread on Minecraft PC before the first night falls. Don’t forget to save extra seeds to expand your farm as soon as you can – you’ll be glad you did when you have chests full of bread to use for whatever your world throws at you.