Anyone who’s put even 10 hours into Minecraft survival knows the frustration of watching your favorite diamond pickaxe creep toward zero durability, or opening a chest to find 12 random enchanted golden swords you’ll never use. That’s where knowing how to make a grindstone in Minecraft becomes one of the most useful early-game skills you can pick up. I remember wasting stacks of planks making new stone tools before I learned how much a grindstone could cut down on resource waste, and I now make it one of the first utility blocks I craft in every new playthrough. It doesn’t require rare materials, takes 10 seconds to put together, and solves three of the most annoying survival pain points all at once.
What You Need to Make a Grindstone in Minecraft
The grindstone recipe is intentionally accessible, so you can craft it within your first few days of a new survival world if you prioritize basic resource collection. You don’t need any rare drops or Nether materials to build it, just items you can get from the Overworld within minutes of spawning. You don’t need a specific type of wood plank for the recipe either, so you can use whatever oak, spruce, birch, or jungle planks you have lying around from your first tree harvest.
Note that the stone slab has to be made from regular stone, not cobblestone. Stone slabs are made from 3 stone blocks, which you get by smelting cobblestone in a furnace for a few seconds. I’ve messed this up more times than I can count by grabbing cobblestone slabs instead, so double check your materials before you start arranging them in the crafting table. If you’re near a village, you can also find grindstones spawning naturally in blacksmith houses, but crafting your own is almost always faster if you’re building a base far from generated structures.
Step-by-Step Grindstone Crafting Process
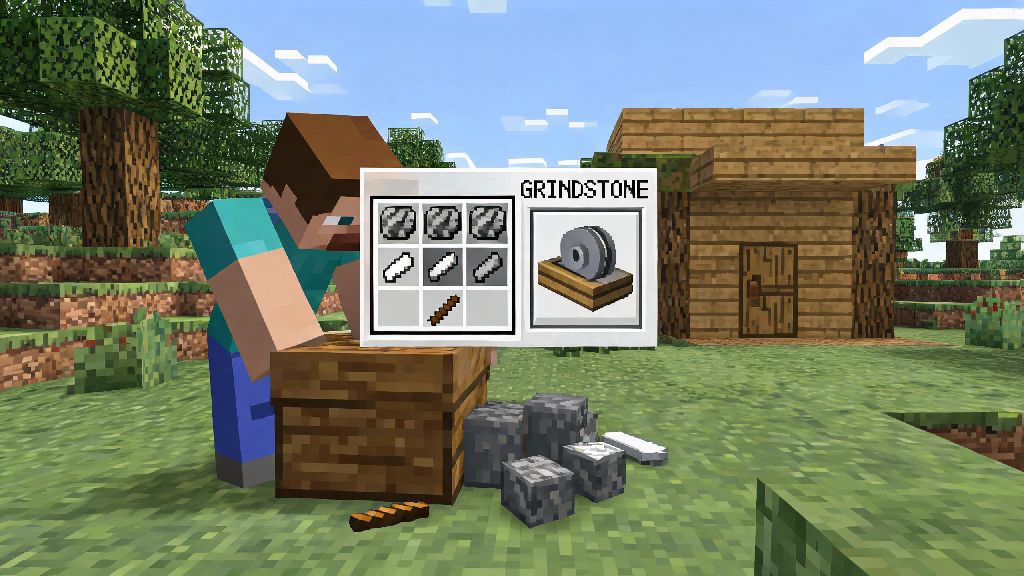
You’ll need a 3x3 crafting table to make a grindstone, so make sure you’ve built one first before you start gathering materials. You can’t craft a grindstone in the 2x2 grid in your personal inventory, since it requires more than 4 item slots to arrange the recipe correctly. Once you have all your materials together, open your crafting table and arrange the items in this exact order.
The top row gets one stick in the left slot and one stick in the right slot, leave the middle top slot completely empty. The middle row gets one wood plank in the left slot, the stone slab in the middle slot, and the second wood plank in the right slot. The entire bottom row stays empty. If you placed everything correctly, a grindstone will appear in the result slot on the right side of the crafting table interface, and you can move it to your inventory or hotbar.
You don’t need any special tools to place a grindstone once it’s crafted. Just select it in your hotbar and right click on any solid block surface to set it down. It works both placed on the ground and mounted to walls, so you can tuck it into small corner spaces in your base if you’re short on room. I usually place mine right next to my furnace and enchanting table for easy access when I’m sorting through loot or repairing mining gear.
Practical Uses for Your Grindstone in Survival Mode
A lot of new players write off the grindstone as a useless decorative block until they learn everything it can do, and that’s a huge mistake. It’s far more than just a village job site block for weaponsmiths. It has three core uses that make it a staple for any survival base, no matter how big or small.
First, it lets you repair tools and weapons completely for free, no experience points required. Unlike anvils, which charge XP to combine damaged items, you can put two identical damaged items (like two stone pickaxes) into the grindstone’s two input slots to get one repaired item in the output slot. The only catch is that it will remove all non-curse enchantments from the items, so only use this repair method for unenchanted gear, or gear with enchants you don’t care about keeping.
Second, you can use it to remove unwanted enchantments from gear and get a small XP refund in the process. If you looted a diamond chestplate with an enchant you’ll never use, or got a bad random enchant from your enchanting table, just place the item in the grindstone to wipe all enchants off of it. You’ll get a small amount of XP back based on the rarity and level of the enchants you removed, which you can put toward your next enchantment session.
Third, you can turn unwanted wooden and leather gear into extra XP. If you have a chest full of wooden hoes, leather helmets, and other low-tier gear you picked up from zombies or loot chests, throw them into the grindstone one at a time to get tiny bits of XP that add up fast over time. Grindstones are also immune to fire and lava damage, so you can place them right next to your smelting area without worrying about them burning up if a stray lava blob spills.
Grindstone vs Anvil: When to Use Which
New players often get confused about whether they need a grindstone or an anvil, and the short answer is you probably need both, but they serve very different purposes. Knowing when to use each will save you a ton of resources and XP over the course of a playthrough.
Use a grindstone when you’re repairing unenchanted gear, getting rid of bad enchants, or farming small amounts of XP from unwanted low-tier items. Grindstones cost almost nothing to make, never break no matter how many times you use them, and don’t charge XP for their core functions. They’re the perfect early-game utility block, and you’ll get a ton of use out of them even late in the game for quick repairs and inventory cleanup.
Use an anvil when you want to keep or combine enchantments, rename items, or repair high-level enchanted gear you’ve invested a lot of XP into. Anvils let you combine two enchanted items to merge their enchantments, or add enchanted books to gear without removing existing enchants. The downsides are that anvils cost 31 iron ingots to craft, take damage over time, and eventually break after about 25 uses, plus they charge XP for every action they perform. I usually wait to craft an anvil until I have a steady iron supply and I’m ready to start working on high-level enchanted gear.
At the end of the day, knowing how to make a grindstone in Minecraft is a small skill that makes a massive difference in how smooth your survival playthrough feels. It’s one of the first blocks I craft every time I start a new world, right after my furnace and crafting table, because it saves me so much time and resources I’d otherwise waste throwing away damaged gear or grinding for extra materials to make new tools. Even if you mostly play creative mode, it’s a handy block to add to roleplay builds or custom village layouts to make them feel more lived-in. Try adding one to your base the next time you log in, you’ll wonder how you ever played without it.