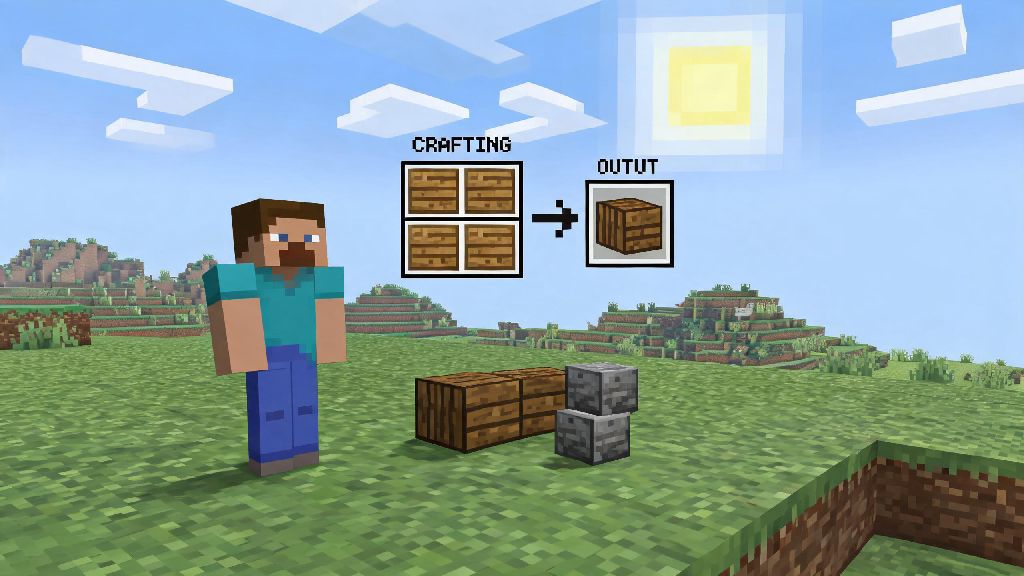
There’s no feeling quite like spawning into a brand new Minecraft world, sun high in the sky and nothing but your fists to work with. You’ll punch a couple oak logs first, maybe grab a few pieces of cobblestone if you pass a cave, but the very first functional item you’ll need to build to get past the most basic gameplay is a crafting bench. If you’re fuzzy on exactly how to make a crafting bench in Minecraft, or what to do with it once you’ve got it, this guide breaks down every step plus little-known hacks to get the most out of this underrated core tool.
How to Make a Crafting Bench in Minecraft: Exact Materials and Steps
The recipe for a crafting bench is intentionally simple, since it’s the first item most new players will craft. You only need 4 wooden planks of any type to make one, no extra tools or rare materials required. You can use oak, spruce, jungle, acacia, dark oak, or mangrove planks, and they don’t even have to match if you’re working with limited supplies early on.
To put it together, first punch one full tree log until it drops as an item. Open your personal inventory, and place the log in any slot of the 2x2 crafting grid in the top right corner of the menu. This will turn 1 log into 4 wooden planks. Move those 4 planks into each of the 4 slots of the 2x2 grid, one per slot, and you’ll see a crafting bench appear in the result slot to the right of the grid. Click it to move it to your inventory, and you’re done.
Any wood type works for the base recipe, but the final bench will take on the color of the planks you use. If you want a dark spruce bench to match your mountain cabin, or a bright bamboo bench for your beach base, just use all matching planks for the recipe. The functionality stays exactly the same no matter what wood type you pick.
Key Placement Rules and Tips for Your Crafting Bench
Most new players place their first crafting bench right outside their first dirt hut and leave it there forever, but you have way more flexibility than that. You don’t have to keep it in your base forever – you can break it with your fist or any tool in 2 seconds flat, pick it up as an item, and carry it in your inventory to place anywhere you need it.
Where you put your crafting bench can save you a ton of time across your playthrough. These are the best spots to keep one handy:
Never place your crafting bench directly beside lava or flammable blocks – it’s made of wood, so it will burn if exposed to fire, and you’ll lose it if you don’t have extra materials to make a new one quickly. If you’re placing it in the Nether, set it down on a cobblestone or netherrack block away from open lava pools to avoid accidents.
Advanced Uses for Your Crafting Bench Most Players Miss
Most players only use their crafting bench for its 3x3 crafting grid, which unlocks all the advanced recipes you can’t make with your personal 2x2 inventory grid. But it has a bunch of secondary uses you might not know about, even if you’ve been playing Minecraft for years.
You can use crafting benches as fuel for furnaces if you’re in a pinch and have no coal or wood left. Each bench burns for 15 seconds, enough to smelt 1.5 items, so it’s not the most efficient fuel source, but it works if you’re stuck deep in a cave with no other options. You can also use them as decorative blocks: they look great as work surfaces in a workshop build, or as counter tops in a kitchen in your survival base.
If you’re playing on a multiplayer server, you can name your crafting bench with a name tag to mark it as yours, so other players don’t accidentally take it or move it. You can also use it as a temporary block to pillar up if you’re being chased by a creeper and don’t have any dirt or cobblestone in your hotbar. You don’t have to destroy a crafting bench to move it – just hit it with any tool (or even your fist) and it will drop as an item you can pick up and place somewhere else, no durability loss at all.
Common Mistakes to Avoid With Your First Crafting Bench
New players often make small mistakes with their first crafting bench that waste time or lead to frustrating losses, especially right before the first night falls. The most common mistake is using all your first 4 planks to make wooden tools instead of saving them for the crafting bench. If you do that, you’ll have to go punch another log to get more planks, which eats up precious time you could be using to build a shelter before mobs spawn.
Another common mistake is leaving items in the crafting grid when you close the bench menu. Any items left in the crafting bench’s grid will drop on the ground if you close the menu without taking them, so always double check you’ve grabbed everything before you walk away, especially if you’re using rare materials like netherite or diamonds. If you’re playing on a PvP server, never leave your crafting bench out in the open unguarded – other players can easily destroy it and steal any dropped items if you walk away for even a minute.
You also don’t need to make 5 or 6 extra crafting benches for different parts of your base. One is enough for most single player worlds, since you can carry it with you instead of cluttering your storage chests with extra copies. If you’re playing modded Minecraft, some mods add upgraded crafting benches with extra slots or automatic crafting features, but the base vanilla recipe still works for the standard model, so you don’t have to learn a new recipe if you’re testing out a mod pack for the first time.
At the end of the day, the crafting bench is the backbone of every Minecraft playthrough, whether you’re playing a casual creative build or a hardmode survival run with permadeath turned on. Once you know how to make a crafting bench in Minecraft, you unlock access to every single recipe in the game, from wooden pickaxes all the way up to end crystals and netherite armor. Play around with placement, test out its weird secondary uses, and don’t be afraid to move it around as your base and playstyle evolve – it’s one of the most flexible tools you’ll ever own in the game.