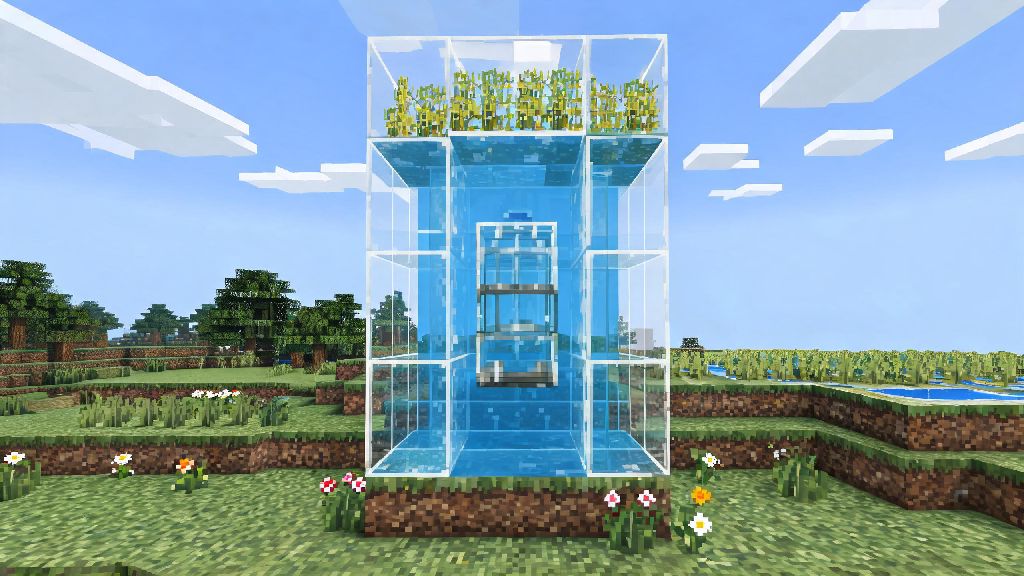
If you’ve ever trekked up 20 flights of stairs in your survival base after a long mining trip, you know how tedious slow vertical travel can get. You don’t need fancy redstone contraptions or rare netherite parts to fix this, either. Learning how to make a water elevator in Minecraft is one of the most practical, low-cost builds you can add to any base, floating structure, or underwater outpost. I’ve built dozens of these across Java and Bedrock worlds over the years, and even the most basic version cuts travel time between your ground floor and rooftop farm by 90% with zero maintenance needed.
Key Materials You’ll Need for Any Water Elevator Build
You don’t need rare or hard-to-find items for this build, which is why it’s such a popular pick for new survival players. All the core materials can be gathered within the first few days of a new world if you know where to look. The full list is:
I usually keep a stack of glass and a bucket of water in my base storage specifically for elevator builds, since I end up adding them to almost every structure I make. You can swap out any of the non-core materials to match your base’s aesthetic, no functional changes required.
How to Make a Water Elevator in Minecraft: Step-by-Step Build Process
Start by deciding how tall you want your elevator to be, and mark the bottom and top points of your shaft. Most players build elevators between 10 and 30 blocks tall, but you can make it as tall as you want with no extra work. First, build your frame: make a 2x2 or 1x1 column of empty space surrounded by your frame blocks. I prefer 2x2 for larger bases, since you can fit multiple players or mobs in the elevator at once, but 1x1 works for smaller, more discreet builds.
Next, place your soul sand or magma block in the very bottom center of the empty shaft. If you’re making a two-way elevator, you can build two separate 1x1 shafts side by side, one with soul sand and one with magma. Now you need to fill the entire shaft with water source blocks. The easiest way to do this is to place one water block at the very top of the shaft, then swim down and place kelp all the way from the bottom to the top. Kelp turns every flowing water block it touches into a permanent source block, so once you remove the kelp, your entire shaft is filled with still water.
Place your door or trapdoor at the entrance of the elevator at ground level, so water doesn’t spill out into your base. Test it by stepping into the shaft: if you placed soul sand at the bottom, you’ll immediately float upward to the top. If you used magma, you’ll sink slowly downward. You don’t need any extra parts for this to work, but I usually add a small platform at the top so you don’t fall off the elevator once you reach your stop. It only takes 2 extra blocks, and it saves you from taking fall damage if you’re not paying attention when you arrive.
Pro Tips to Make Your Water Elevator Work for Both Java and Bedrock Editions
One of the best parts of this build is that it works almost exactly the same on both Java and Bedrock editions, but there are a few small differences you need to account for to avoid mistakes. For Java edition players, you don’t need to worry about bubble columns disappearing if you place a block near the elevator, but you do need to make sure there are no gaps in your water source blocks. Even one flowing water block will break the bubble column and stop the elevator from working. I always swim up and down the shaft once after building to check for any gaps I missed.
For Bedrock edition players, you might notice that bubble columns work a little faster than they do on Java, but you’ll need to make sure your entrance trapdoor is placed correctly to stop water from leaking. Bedrock has slightly different fluid physics, so a door that works perfectly on Java might let a small amount of water out on Bedrock if it’s not aligned right. One tip that works for both editions is to add a sign on the inside of the entrance door if you’re building a 1x1 elevator. The sign will stop water from flowing out even if you forget to close the door behind you, which is a huge help if you’re carrying a full inventory of blocks and don’t want to stop to close doors.
If you’re building an elevator for a survival server, make sure to claim the area around it so other players can’t break the soul sand or magma block at the bottom. I’ve had multiple elevators broken by new players who didn’t know what soul sand was for, and it’s a huge hassle to rebuild if you have to travel all the way to the nether to get more. If you’re troubleshooting a broken water elevator, the first thing to check is that your soul sand is placed directly under a full water source block, with no gaps in between.
Creative Customizations to Upgrade Your Basic Water Elevator
Once you’ve got the basic build down, you can customize it to fit almost any base design or use case. I’ve made themed elevators for underwater bases, sky bases, and even nether outposts (you just need to make sure the water is protected from lava, obviously). One of my favorite customizations is adding lighting to the frame of the elevator. Glowstone or sea lanterns placed between the glass blocks make the elevator visible from far away at night, and it adds a nice decorative touch to your base. You can even use colored glass to match your base’s color scheme, no functional changes needed.
If you want a more high-end look, you can add a bubble elevator entrance hidden behind a secret door. I usually use a sticky piston door that opens when you step on a pressure plate, so the elevator is hidden when it’s not in use. That’s a great pick if you’re building a hidden base or a server spawn where you don’t want new players wandering into your private areas. The only real downside of this build is that it can only move you straight up or down, so you can’t add horizontal stops without building a separate elevator shaft for each section.
For underwater bases, you can build the elevator shaft directly from the ocean floor up to your base entrance. The water elevator works perfectly underwater, and you don’t need to add any extra entrance doors since the entire shaft is already filled with water. I used this trick for a deep ocean base I built last year, and it cut my travel time from the surface to my base by several minutes. This is also a great trick if you’re building a public water elevator for a server spawn, since it will keep working even if players leave doors open. You can also add multiple stops to your elevator if you have multiple floors in your base. Just add a small platform with a trapdoor at each floor level. When you reach the floor you want, you can swim out through the trapdoor, and the water will stay contained in the shaft.
At the end of the day, there’s a reason this build is one of the most popular in the entire game. It’s cheap, fast to build, and works for almost every use case you can think of, from small survival huts to massive creative mode megabases. Now that you know how to make a water elevator in Minecraft, you can cut out all the tedious stair climbing and spend more time on the parts of the game you actually enjoy. Next time you’re tired of trekking up and down your base, give this build a try – you won’t regret it.