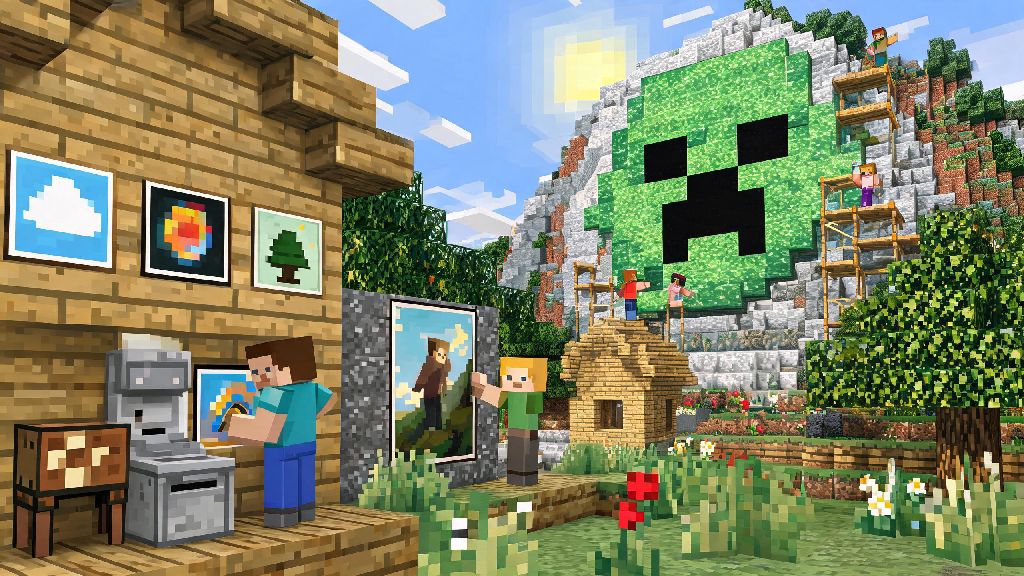
If you’ve scrolled through Minecraft community feeds in 2026, you’ve probably seen everything from tiny 1x1 vanilla paintings decorating cottage kitchens to massive 100x100 pixel art murals covering entire server spawn mountains. A lot of new players reach out asking how do you make a painting on Minecraft, whether they want to add a cozy touch to their survival base or show off fan art for their favorite game. This guide covers every step, from basic vanilla crafting to advanced custom mural builds, with 2026-specific hacks to cut down on build time and avoid common frustrations.
How Do You Make a Painting on Minecraft: Core Materials You’ll Need in 2026
The materials you need depend entirely on what type of painting you want to make, so we’ve split this list into two categories: vanilla item paintings and custom large-scale pixel art paintings. For vanilla paintings, you won’t need any rare materials, even in survival mode. You only need two core items to craft a vanilla Minecraft painting, regardless of what design you end up with after placement.
If you’re making a custom pixel art painting, your material list will be longer, and you’ll want to pick blocks that fit your design and play style. 2026’s most popular block choices for custom art are concrete, thanks to its high color saturation and fire resistance, and glazed terracotta, which adds subtle texture for shaded designs. Wool works too, but it’s highly flammable, so skip it if you’re building near lava or fire sources. Don’t forget to grab grid markers like torches or colored cobblestone if you’re building a mural larger than 20x20 blocks to keep your lines straight.
For vanilla paintings, your pre-crafting checklist is super short:
Step-by-Step Guide to Crafting and Placing Vanilla Minecraft Paintings
Crafting the painting item itself only takes a few seconds, even if you’re brand new to the game. Open your crafting table menu and arrange the 8 sticks in a full border around the edge of the 3x3 grid, leaving the very center slot empty. Place your wool block in that empty center slot, and the painting item will pop up in the result slot. Drag it to your inventory, and you’re ready to place it. Many new players waste time dyeing wool specific colors for paintings, but this doesn’t change the final design at all, so save your dye for other builds.
Placement is where most people get stuck, because vanilla painting designs are random when you first place them. The trick to getting the size and design you want is controlling the amount of empty wall space around your placement spot. If you only leave a 1x1 open spot on the wall, you’ll only get small 1x1 paintings. If you leave a 4x4 open wall space, you’ll have a chance to get the largest 4x4 designs, including the iconic creeper and Wither paintings. All you have to do is break and re-place the painting until you get the design you want.
If you’re playing survival mode and don’t want to waste durability on breaking paintings over and over, you can hop into a creative test world first to test placement. Once you find the right spot that spawns your preferred design, mark it and replicate the wall setup in your survival world. It’s a small hack that saves a lot of frustration, especially if you’re trying to get one of the rarer 4x4 designs. You can also place blocks temporarily around your placement spot to limit the wall size, then remove them once you get the painting you want if you don’t have a large empty wall to work with.
How to Create Custom Large-Scale Minecraft Paintings in 2026
Vanilla paintings are fun for small decorations, but if you want to make something totally unique like a portrait of your pet, fan art of your favorite show, or a server logo mural, you’ll want to build a custom pixel art painting. 2026 has dozens of free, browser-based tools that make this process way easier than it was even a few years ago – you don’t have to count pixels manually anymore. All you do is upload your reference image, pick the size you want your painting to be, and the tool will generate a full block list and layer-by-layer build guide for you.
Before you start building, pick a spot that fits your chosen size. If your tool generates a 32x32 design, you’ll need a 32 block tall, 32 block wide flat wall to build on. Always build a small 5x5 test swatch of your color palette first to make sure the blocks look good together in your world’s lighting. A color that looks perfect in the tool might look too dark or too bright in your survival base’s torch lighting, so testing first saves you from having to tear down half the build later.
For very large murals (over 50x50 blocks), divide your wall into 10x10 sections with your grid markers first. This makes it way easier to follow the layer guide without losing your place, and you can finish one section at a time to avoid burnout. If you’re building on a multiplayer server, double check with server admins first to make sure your build spot isn’t reserved for another project, and that you’re allowed to use the block types you’ve picked. Some servers limit fire spread, so you can use wool without worrying about it burning down, but it’s always better to ask first.
Common Mistakes to Avoid When Making Minecraft Paintings in 2026
Even experienced players make mistakes when building paintings, especially when trying out custom murals for the first time. The most common mistake we see is people forgetting to leave empty space in front of their wall for vanilla paintings. Paintings need a full block of empty air in front of the wall to spawn, so if you have a carpet, fence, or even a torch right in front of the spot you’re trying to place, it won’t work. Move any blocks or items out of the 1 block space in front of your wall first if your painting won’t place instead of wasting time re-crafting the item.
Another big mistake for custom murals is mixing too many different block types. It can be tempting to use wood, glass, wool, and concrete all in one design to get more color options, but too many different textures will make your design look messy and unrecognizable from a distance. Stick to 2-3 block types maximum for the best result – concrete and glazed terracotta is a popular 2026 combination that gives you both solid and subtle textured options without looking cluttered.
For survival mode players, don’t start building a large custom painting until you’ve collected 100% of the blocks you need. Nothing is more frustrating than getting halfway through a portrait of your favorite character and realizing you ran out of pink concrete and have to go mine more sand and dye. Add 10% extra blocks to your collected count before you start building to account for placement mistakes, so you don’t have to pause mid-build to gather more materials.
The last common mistake is not saving your custom design. If you used an online tool to generate your mural, save the design to your account or take screenshots of each layer guide. If your world corrupts or you accidentally delete the build, you won’t have to start from scratch re-uploading your reference image. Most 2026 pixel art tools have free cloud save features, so it only takes a few clicks to back up your work.
So, whether you’re sprucing up your survival cottage with a small vanilla landscape piece or building a giant server mural for your whole community to enjoy, you now know exactly how do you make a painting on Minecraft that fits your style. Don’t be afraid to experiment with weird color combinations or unusual reference images in 2026 – some of the most popular community paintings this year came from players messing around with random block swatches and happy accidents. If you share your finished build on social media, tag the Minecraft creative community so everyone can see your work!